
Microsoft Office and Adobe Acrobat are among the most commonly used software tools on the market. Please find the following step by step processes that provide some guidance to ensure the accessibility of the documents and pdfs that you create. Text within Microsoft Office documents have the ability to be read by assistive technology tools such as screen readers (JAWS and MAGic), as well as Braille devices.
Training
UFIT has partnered with the online training resource center Lynda.com to bring access to thousands of training videos.
- First, log in to LinkedIn Learning
- Select your desired training course. (If you do not log in with your UF credentials, you will not be able to view all of the videos.)
Accessibility Strategies for Microsoft Word
Alternative (Alt) Text
An important feature in Microsoft Word is to add alternative text to an object or image. The description should be short and effectively communicate the purpose and/or content of the image.
To add Alt text, please right click on an image and select Format Picture
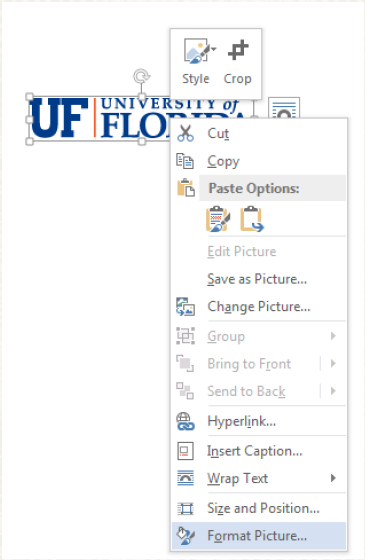
Provide a description of the image or object in the ‘Description’ and not in the ‘Title’

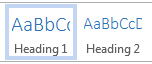
Headings
Utilizing built-in headings provides a hierarchy and organizational framework will help readers navigate the document in a more effective way.
Headings should form an outline of the document where ‘Heading 1’ is used for the main title or heading of the document and ‘Heading 2’ and so on are used for sub-headings.
An individual using assistive technology can therefore determine the organization of the content while navigating from heading to heading.
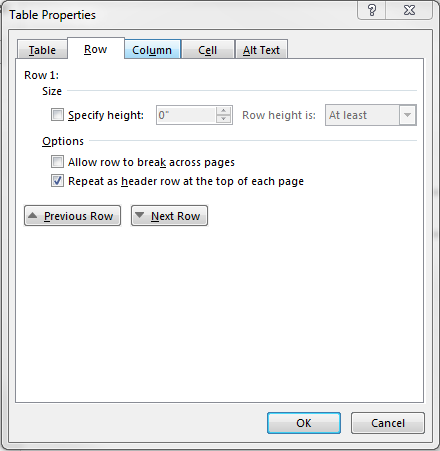
Tables
When using Tables, try to use 6 columns or less.
In the ‘Design’ tab, make sure the ‘Header Row’ and ‘First Column’ boxes are checked. In addition, right click on the table and select ‘Table Properties’ and click the ‘Row’ tab and check the box that says ‘Repeat as header row at the top of each page.’

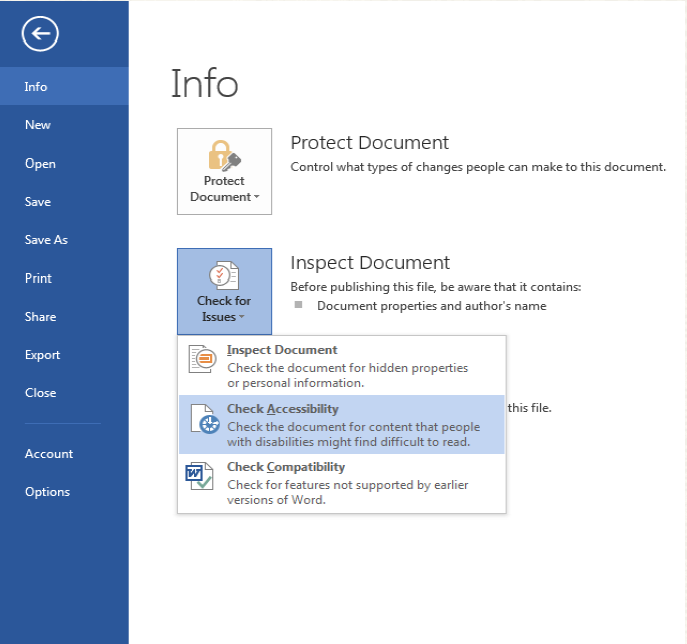
Checking for Accessibility
Once you are finished, you can scan the Word document by clicking on the feature ‘Accessibility Checker’. By doing so, the feature will highlight and explain accessibility issues it found. You can then go back into the document to fix any of the issues before you save the document.
For additional information on making your document more accessible in Microsoft Word, please feel free to visit Creating accessible Word documents at Office Support.
Accessibility Strategies for PDFs
Step 1:
Go to File > Save As and select PDF from the dropdown list.
Step 2:
Select ‘Options’ and make sure that the ‘Document structure tags for accessibility’ is selected.

Portable Document Format (PDF) is one of the most widely used software tools to reliably view and edit documents. As such, ensuring these documents are accessible to all students is an important step.
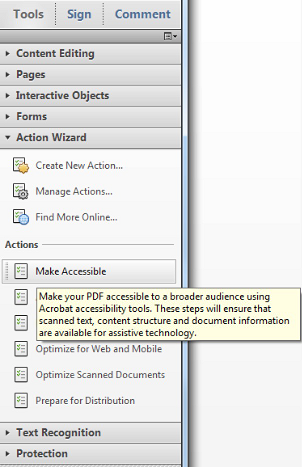
Step 1:
Select Tools > Action Wizard.
Step 2:
From the Action List, click, Make Accessible.
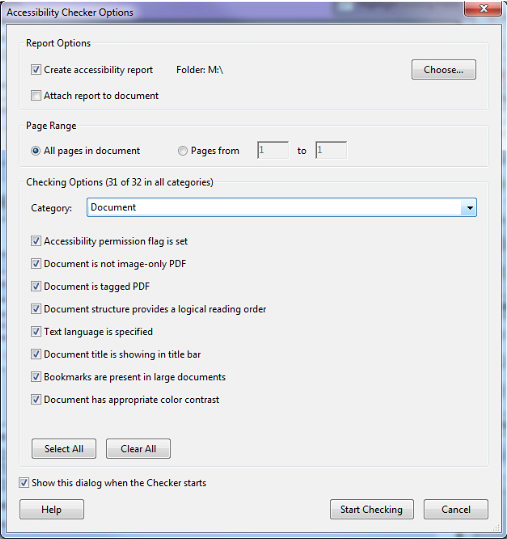
Step 3:
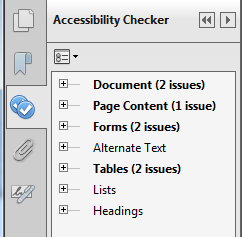
Click Start and follow the prompts to complete the action. The results are displayed in the Accessibility Checker panel on the left, which also has helpful links and hints for repairing issues.
Step 4:
Click Start Checking.
Performing Optical Character Recognition (OCR) on PDF documents
According to W3C, "A document that consists of scanned images of text is inherently inaccessible because the content of the document is images, not searchable text. Assistive technologies cannot read or extract the words; users cannot select, edit, resize, or reflow text nor can they change text and background colors; and authors cannot manipulate the PDF for accessibility." Please examine the following tutorials on optimal character recognition in PDF documents for additional information.
SensusAccess
You may use SensusAccess to convert other types of documents into accessible formats.